Friday, August 30, 2013
DIY Roman Shade
Tuesday, February 5, 2013
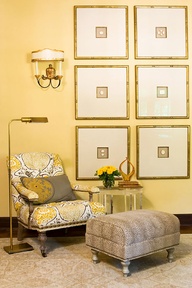
Fill those Walls.
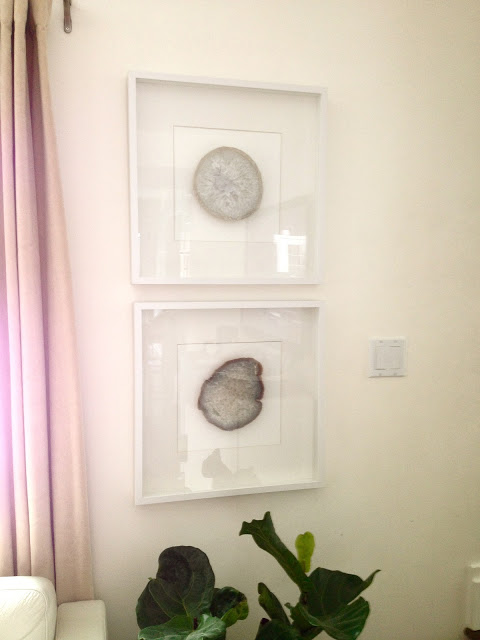
I saw a framed agate trivet tutorial from Erica Cook that I think looks beautiful and easy to do.

Monday, March 12, 2012
Since you've been asking...
 "Liming" how-to. The can claims you don't have to sand your furniture, just apply a coat of the liming wax to a surface and you will have that white-washed look. I did that on raw wood and it just looked white. So, I stained the wood with a rag, a little bit goes a long way, and I didn't even let the stain dry before I applied the liming wax with another rag over the stain. I prefer staining to paint because you can play with the color and finish much more than you can with paint.
 If your furniture has an existing finish, I would sand it down to somewhat open "the pores", clean it off and then add the liming wax. Most furniture will have a lacquer finish and you want to penetrate past that, so sand it. You will know pretty quickly what the "finish" will look like. If you sand your existing piece of furniture down and the base color is too light, I would apply a stain, then the liming wax over the stain and let it dry. I wanted a dark grey for my headboard so the staining was an important step for me.
Thursday, March 8, 2012
Liming Wax Review.

I am a sucker for all white bedding, but I loved how this pinstripe duvet from Pottery Barn accented the linen headboard. Also, this guy is in bed a lot and the stripe camouflages his ever-shedding hair.
Wednesday, August 24, 2011
DIY Shellac
I'm tempted to spend some upcoming birthday dollars on this system.
Should I DIY it? You can come over and I'll paint your nails too and ask "square or round"?
Wednesday, April 6, 2011
A Dose of Inspiration.
First up, Beth who writes the adorable blog, Embracing Twenty Something, made a garment rack to display her pretty clothes. She has an incredible, industrial apartment with a killer view of Buckhead. This rack is very fitting for her space.


Next up, Teri (without a blog but she should start one) is ditching old items from her home and she is busy buying, recovering or creating items she loves.
Teri used the fioretto fabric from Lewis and Sharon to recover her dining room chairs. I love the overall makeover these chairs received. They are so fresh and pretty.

I have this same fabric is our sunroom and I just adore it.
What projects have you been up to?
Monday, February 15, 2010
Events Overload.
 Next up, an Ice Cream Parlour from Eat Drink Chic
 Amy Moss is a graphic designer in Melbourne, Australia. She's incredibly generous with downloadable projects and instructions on DIY projects. Her site is a must visit.
 Tuesday, November 17, 2009
Burlap Lampshades.

I bought some burlap at Joann's and took out my trusty glue gun and went to work. I was not able to take pictures of the process, but I simply started at the top and laid glue every 2-3 inches and stretched the burlap over the glue. I pressed it down around 10 seconds and repeated the whole process until they were complete.

I wanted to keep them in the guestroom after their makeover was complete, but I spend so much time in this office I thought I shouldn't deprive my workplace of style!

***A little hint- They do not allow much light to pass through. Perhaps if I removed the original shade before I recovered the 1st one they would illuminate more brightly, but the picture below is pretty accurate to show the amount of light that passes through.

Wednesday, October 21, 2009
Repurpose.


See instructions on how to here.

All uses are so clever, affordable and stylish.
Tuesday, September 15, 2009
Affordable Design.
Her latest project was decorating her girls room. She did most of the shopping from her basement and gave a fresh look to old pieces. You can click on this link to see that project. What I loved were her pelmet window boxes.


I'm not going to duplicate her project word for word. But if you're interested in the "how to" of this project, Click here. Enjoy!
Wednesday, July 29, 2009
Dye-It.
This is the original dress on our honeymoon

Certainly this can be salvaged. Here's how I did it:


Let it simmer in the pot of water for 30 minutes. Stir occasionally and wait. This is what Buster looks like when he waits for us to get home.

Rinse the garment under water until the water runs clear then enjoy your new garment.


Rit also carries a whitener/brightener product that I plan to use on our duvet. It's looking shabby and sometimes bleach doesn't cut it.
Tuesday, March 24, 2009
Simple Centerpieces
At my work, we had our Winter Board meeting and I offered to take a stab at creating our centerpieces in
#1. Hopes of saving some money
#2. Having an excuse to do a fun project.
I called Publix and ordered 10 bundles for this project (300 carnations in total). I underestimated the enormous amount of carnations that are necessary for each centerpiece. You need around 50 per centerpiece. We had 13 tables. 13 x 50= 650. Not 300.
No need to panic. I went back to Publix and bought some white mums. Only 10 mums were required per centerpiece. Each centerpiece took less than 5 minutes to create and the flowers stayed alive for a week after the event. I think they would be so charming for a wedding.


the picture tutorial via Eddie Ross


Mixed carnations and mums (i prefer the carnations) . I received compliments like a rock star and showed a few older women how I made them.
Tuesday, February 24, 2009
Weekend Project: Downstairs Bathroom
"I still haven't run my 5k"
Me: "let's do it"
Jo: "I love you thanks"
So she signed us up for the ZTA breast cancer 5k around FSU. So fun and unexpected and we did it! great job Jo, next up, 1/2 marathon (that will be another post)
Run- check, now what? Enter our broken toilet. Since we've owned this house, the downstairs toilet has been nothing but a bother. It runs when it wants to and throughout the night and it stops at the most inconvenient times for our guests. (think Dumb and Dumber) Our handy brother-in-law, Bibb, talked the husband into demolishing the whole bathroom instead of simply replacing the toilet and then having to reinstall it when we decided to put up the beadboard, install the new tilt mirror, rewire the lighting to give us sconces, sand down the doors and repaint. So that's exactly what we did.

terrible mirror and light fixture:


the progress:

and the glorious reveal that makes me want to use this bathroom:
 **I should be patient and post pictures when it is finally complete with guest towels and a soap dispenser and little nick knacks, but I get too excited and have to share. We still have to replace the plumbing in the tub and re-glaze or completely re-tile the shower but for now the shower curtain conceals that!
Monday, January 5, 2009
Home Made Goodies
Here are the simple steps:
1.)I found candle votive holders at Big Lots (which I have not been able to find anywhere else, so please let me know if anyone finds them)
2.) I used My Publisher in Microsoft Office to get the font and style I was looking for
3.) Laminated the paper in order to make these as water proof as possible
4.) Sealed the paper around the coaster with E600 glue (the man at Michael's recommended it for water proofing and drying clear)
5.) Finished the coasters off with self adhesive felt
I made 4 coasters for my brother and sister in law. They live in South Florida and are newlyweds, so how cute are those smooching seahorses?

I also made a set for the most wonderful, I-hope-I-turn-into-her grandma, Nanu.

The second set was for Tony's grandparents, Meems and Peeps, that live in SC. I just did not want to show up empty handed to their house and thought it was a cute idea.

I love making gifts for people. I hope they like them as well!


